Dubai-based post-production specialist Dan Mitre explores whether Blackmagic Design has finally found the secret recipe to make this a mainstream, must-have option for editors and if the Editor Keyboard is a tempting addition to the mix.
By Dan Mitre.
Blackmagic Design DaVinci Resolve 16.2 is the latest update to the company’s popular edit, colour, visual effects and audio post production software that includes major Fairlight updates for audio post production. In this review, Dubai-based post-production specialist Dan Mitre explores whether Blackmagic Design has finally found the secret recipe for making this a mainstream.
Blackmagic Design’s DaVinci Resolve has been a tool of choice within the NLE space for many professional colourists, editors and other post-production experts. No doubt it is discussed and criticised by many, but it is also trusted and loved by many more. So when I was asked to review not just the Resolve 16.2 but also the Editor Keyboard, which we hadn’t used before, I was curious to know if their combined use could improve our post-production efficiencies.
But first, a look at Resolve 16 because that’s where most of the changes began. One of the things I like about this software is that ever since it was acquired by Blackmagic Design in 2009, support and development have been exceptional. The company has constantly tried to improve its GUI and efficiency, and this is what one needs in post-production – a reliable tool that offers flexibility and the ability to deliver, combined with great support.
If you compare 16 with the previous versions of DaVinci, there’s not much difference in the GUI or the style of work, but there are some new additions.
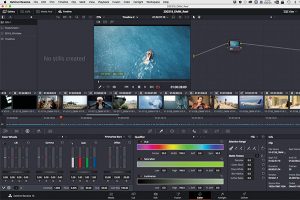
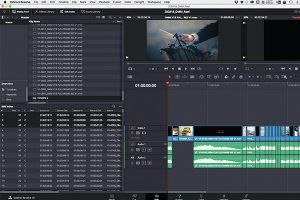
The Cut Page is one. Its UI is very user-friendly, compressed and simplified, but it comes with a heap of features designed particularly for editors on the go and is almost like a software within the software.
I recently attended a T3 workshop in the UK so that I could add custom training sessions for producers, DOPs, directors, colourists and other professionals alongside the raft of commercial training services we offer in Dubai. At the workshop, I discovered the full potential of Cut Page and how it offers a combination of new editing techniques with older styles of edit, alongside new and improved features like Smart Editing.
These include elements like an amusingly self-descriptive Boring Detector, which highlights clips on the timeline that may need to be cut down in length. There is also a Jump Cut Detector, which highlights quick jarring edits. The close-up edit feature has also been updated using the AI-driven neural engine of DaVinci introduced in 16.0, automatically identifying faces in a shot and reframing them accordingly.
The Cut Page offers several smart editing functions that help you speed up your workflow. It is primarily intended to simplify and streamline the editing process for certain types of jobs where you need to edit on the spot and deliver for social media. Its page is compact, with the tools and GUI designed for mobility and artists on location. With the media pool located on the top left, you can avoid going back and forth to the media page for importing or adding clips or other elements. You can resize the Media Pool and Viewer by dragging the vertical seam that connects them to the left or right, in the process making one panel bigger and the neighbouring panel smaller, and the toolbar can be customised.
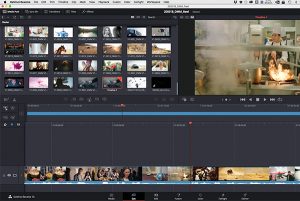
Another important feature of the Cut Page is the dual timeline – I don’t particularly like this, as it takes some getting used to. It is fully zoomed out to show all the clips in the timeline, and you can’t zoom in to a specific part of it. The upper timeline doesn’t show a clip thumbnail preview or clip name, and you also can’t zoom out of the primary timeline underneath. This is against the feature of the first timeline above, as you could click a clip in the upper timeline to jump to an earlier section in the edit. It would be nice to have some kind of clip preview in the upper timeline or to be able to do a slight zoom out below.
There are also exclusive features on the new Cut Page that we could actually use on the Edit Page. Although the Cut Page may be designed especially for those on-the-go, editors also often need to drop their rushes into the timeline and then quickly edit the piece, render and deliver fast, and this would be equally useful for them.
Our company mostly works on high-end commercials, then long formats, documentaries and feature films, and social media projects, in that order. Irrespective of whom we are working for, most of the commercials we work for have a version for online media, so it’s equally important to keep our needs in mind.
For now, I’m not sure if I will use Cut Page, but I hope to eventually integrate it into my workflows. For lots of people delivering mostly social media content, it is a lifesaver.
Another place where I see this as a perfect fit is in TV and news cutting. Editing in source tape mode may be interesting for news. With the click of a button, all your clips in media pool can be organised as a tape, with gaps in between, just like in the old days when an editor would physically edit on a tape. So editors who used the tape-based workflow before may enjoy using the Cut Page.
For me, the style of working with this Cut Page is quite flexible and less rigid than the styles of other NLE systems. For example, if you want to add a quick effect or transition, you don’t necessarily have to fit exact cut points or in point. You will need to add an in IN point, but if you can have your cursor nearby, with the click of a button or a keyboard shortcut, you can immediately add a cross dissolve or other quick effect. I find that very efficient and fast in our work today.
Another useful feature is the Quick Export option, which allows access to some render presets without the need for the Deliver Page. With this feature, the end user can export in various formats, the same as in a delivery page, but also upload or send directly to an online account on Vimeo or YouTube.
The introduction of Cut Page to Resolve 16 will attract many new users. It has simplified the traditional workflow, which was maybe too visually complex for some. Some other interesting features in this new version include Media, Edit, Fusion, Colour, Fairlight and the Deliver Page.
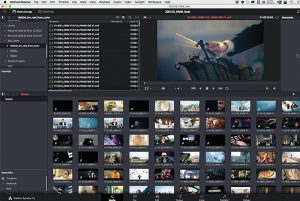
Within Media, there is improved audio track metadata support, with support for up to 24 tracks, and support for duplicated clips and timelines being placed in the source bin; media pool clips by date added; showing synced audio file names in the media pool list view; revealing the media pool location of a clip from a smart bin; and more.
Within Edit, shot stabilisation is now built into every clip. Fusion also offers a dramatically improved performance. The planar and auto tracker have improved performance and accuracy a lot. All 3D operations are GPU-accelerated, making Fusion much more responsive when working in 3D. In addition, there are a lot of effects supported by GPU acceleration – time effects, stereo tools, 3D text and more.
The Colour feature includes new finishing tools, workflow improvements and significantly improved GPU-accelerated video scopes and effects. The Auto Colour tool uses the AI from the neuroengine to assist in quickly reaching a neutral starting point.
The release of the Fairlight sound library installer for foley effects is another impressive element worth speaking about. It offers support for searching and displaying sound library description metadata. New loudness tools ensure that projects meet the required level standards for delivery.
The Deliver Page for faster and smarter encoding allows you to encode only the frames that have changed, instead of re-encoding entire files, for dramatically faster rendering.
When you’re on a tight deadline, you need to be able to deliver finished programmes fast. The new Quick Export tool lets you quickly render and upload to online services such as YouTube and Vimeo. The Quick Export menu is on all DaVinci Resolve pages, so you can now instantly render out a finished edit without using the Deliver Page. You can also create your own Quick Export presets for saving local files.
There are still people who question if DaVinci is there yet in terms of editing – I’d say it’s getting there. I’ve used Resolve for editing even from earlier versions, and it all depends on how you customise your workflow for the type of project you’re currently working on. But there is no excuse anymore to say that compared to Adobe Premiere or Avid Media Composer, Resolve is not yet there.
Even though DaVinci Resolve is number 1 choice for me, our studio uses a combination of software applications for offline editing, colour grading, VFX and online conforming. While we use Adobe and Avid Media Composer, we finalise the online conforming for most of our projects on Resolve.
Depending on client needs and the workflow, we customise it to fit all. On some jobs, we do full post-production and then customise our workflow based on the artist’s preference. For example, we can do the offline edit in Avid Media Composer or Adobe Premiere, then move to DaVinci Resolve for colour and final online conforming. For more advanced VFX, we use After Effects, Nuke or Flame, and sometimes we undertake the final conforming straight in Avid or Premiere.
I personally prefer to keep most work inside Resolve, but because I tend to work with the best artists in each department, I have to customise our workflow to suit everybody’s tastes and allow creative freedom for each artist. Sometimes I even do VFX work directly in DaVinci, using a combination of the existing features on the Edit and Colour pages, and techniques that are mostly for colour isolation or treatment. But if it gives you the result you want, then great.
You have the Fusion age in DaVinci Resolve for more advanced VFX work or the stand-alone Fusion Studio. This can sometimes appear a bit clunky, but Resolve 16.0 gives you a great deal of creative flexibility.
Dan Mitre is Creative Producer and founder of Dan Mitre Media in Dubai.


