


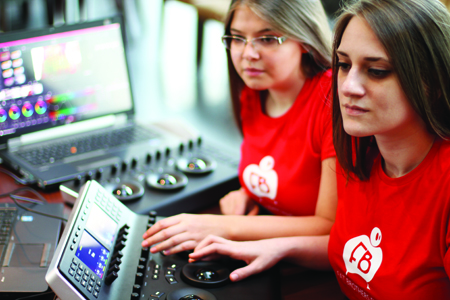
Dubai-based producers Teneille Saayman and Nina Sargsyan of Fat Brothers Films test the DaVinci Resolve Mini and Micro colour grading panels and give us their verdict.
and Nina Sargsyan.
Dubai-based producers Teneille Saayman and Nina Sargsyan of Fat Brothers Films test the DaVinci Resolve Mini and Micro colour grading panels and give us their verdict
Blackmagic Design has always paid close attention to technical details and customer requirements simultaneously. With the release of its two new colour grading control panels, the DaVinci Resolve Mini Panel and the DaVinci Resolve Micro Panel, Blackmagic has given its users two of the most efficient and affordable control panels, capable of transforming any workflow from on-set production to post, giving us complete control.
At our company Fat Brothers Films, we rely hugely on on-set colour grading through our mobile workstations while shooting a scene, rather than taking it to our colour grading suite in post. These panels can make our mobile workflow more efficient, saving us an incredible amount of time that is otherwise wasted in post if footage is not gradable.
DaVinci Resolve Micro Panel
The DaVinci Resolve Micro Panel is a great tool for those constantly on the move and working live on set. Whether its doing dailies or just colour grading footage, the size and weight of this panel makes it easy to take with you wherever you go. Whats great about the Micro Panel is that its compatible with any system as long as you have DaVinci Resolve 12.5.5 installed. No additional drivers need to be installed on the system, and so users can plug in the panel and get to work right away. The Micro Panel is powered via the USB cable, so all users have to do is plug the control panel into a workstation and get started.
For a panel this size, it has an impressive set of controls. The panel is equipped with 12 knobs, each with 4,096 steps per rotation, three high-resolution weighted trackballs with their own control keys, 18 dedicated navigation keys and three parameter keys. The body is made of aluminium and has rubber grips on the bottom of the panel, making it safe to use on any surface. The panel has a sleek and elegant look with a great layout each trackball has enough hand space for users, and the control parameters are laid out within reach of each other.
Upon connecting to DaVinci Resolve, the backlight of the panel comes on, indicating its connected. Users select the panel from the preferences menu in DaVinci Resolve, allowing them to get started right away.
The knobs respond to various grading parameters on the colour page. DaVinci Resolve in itself is a YRGB grade, so the first three knobs starting from the left of the panel adjust the YLift, YGamma and YGain. As any grader knows, these three parameters are essential.
As the user turns the knob, the corresponding control on the colour page shows the adjustments made. Upon adjusting the YGamma, the user can see the Y (Luma) parameter in the primary controls change. To reset the value, the user simply has to press down on the knob and the value is reset. Whats great about having these three control knobs on the panel is that it eliminates the need to return to the computer to make adjustments to the Y (Luma) channels.
The next three knobs allow the user to adjust contrast, pivot and mid detail. Its handy to have these parameters on a panel, as the user can simply adjust the contrast on the image, and by using the pivot knob adjust what part of the image to contrast. This gives users great control over their work with 4,096 steps per rotation, they have enough room to fine tune adjustments. Working on the panel, one can see exactly how smooth the transition is when turning the pivot knob. There is great restraint and control over how the contrast is adjusted to a specific section of the image.
The next six knobs give users the ability to adjust various colour grading and image-related parameters available on the colour page. These include colour boost, shadows, highlights, saturation, hue and LUM mix. Users have the ability to simultaneously adjust various knobs, saving time and speeding up workflow. The fluidity of the knobs allows users to make fast adjustments and move on. There is no need to waste time fiddling with parameters anymore.
Below the knobs and above the trackballs are three soft buttons: LOG, OFFSET and VIEWER. These offer great mobility when working via a control panel. When a user opens the colour page, by default the primary colour palette is active. The LOG button allows the user to quickly switch over to the LOG colour wheels palette and make adjustments via the trackballs and appropriate knobs.
Users in LOG mode or primary mode dont have control over the OFFSET parameter for that, Blackmagic has added the aptly named OFFSET button. Once the user clicks this, the first two trackballs are disabled and only the rightmost trackball is active, corresponding to the OFFSET parameter in the colour wheels. By assigning OFFSET its own trackball, Blackmagic has given users the ability to make adjustments solely to the OFFSET values without any hassle.
The VIEWER button allows users to view their work in fullscreen mode and make adjustments while in this mode.
The three trackballs in the middle of the panel are well crafted and have a good weight to them; the movements are fluid and quite sensitive, giving users the power to finely adjust their colour wheels and primary parameters.
The three trackballs correspond to the traditional DaVinci Resolve format of Lift, Gamma and Gain when in primary grading mode. However, as mentioned before, clicking the LOG button activates the LOG colour wheels, and the trackballs correspond to the shadows, midtones and highlights.
Users can easily make adjustments in LOG space. The centre ball of each trackball controls the tint of the RGB levels and corresponds directly to the colour wheels, and the ring surrounding the ball controls the balance between the RGB levels of an image. The ring and the ball have a good weight to them, which is ideal as they dont move uncontrollably, allowing the user great control when making adjustments.
Above each trackball is a set of three soft buttons; these are extremely useful and offer great efficiency when working with the trackballs. The RGB button allows users to reset only the RGB balance to the default, the ALL button allows users to reset both the RGB and the levels, and finally the LEVEL button resets the level while maintaining RGB differentials. When it comes to creating a mood and atmosphere, every grader is constantly making adjustments in order to achieve the look needed. With these buttons conveniently located above the main colour adjustment controls, Blackmagic has given users the ability to make adjustments and reset as needed in one quick step.
On the left side of the panel is a set of 18 soft buttons. These are the control buttons separated into three sections. They provide control over workflow and save a lot of time, eliminating the back and forth between panel and computer.
The first set consists of nine buttons on the top. These include Undo and Redo buttons, giving users the ability to quickly undo or redo changes. Grab Still allows users to quickly grab a still of the footage they are working on and move on, while Play Still allows users to quickly view that still in wipe mode.
This provides a quick comparison while working, and increases workflow speed.
The Bypass, Disable and Reset buttons are handy tools that allow users to quickly bypass certain nodes when needed, for comparison of nodes; its also possible to simply disable all nodes to view the original footage and grab a still for comparison with the graded footage.
Lastly, the most useful button is Reset, which allows users to reset all the work they have done and start anew without needing to go back to the computer to set everything up again.
The middle set of buttons are six soft buttons corresponding to node and clip parameters. Users can control the node they are working on by navigating via the Prev Node and Next Node buttons. These are also great when paired with the Bypass button, as users can navigate to the node they want to bypass easily. Prev Frame and Next Frame allow users to scrub through a clip and look through each frame to assess grades. Prev Clip and Next Clip allow users to quickly navigate between clips without having to go to the keyboard.
The last three buttons consist of a left arrow which plays the clip backwards, a right arrow which plays the clip forward, and finally the stop button. These give users great mobility within their workflow and allow great control over work.
The Micro Panel packs a punch compared to other small-sized panels in the market, which come with just trackballs and a few buttons. It provides a variety of essential tools needed to colour grade with ease. The panel itself is extremely user-friendly; even if you are a first-time user, the panel is easy to understand and fast to use. At an affordable price, this panel has a good variety of options and is a perfect size for travel.
DaVinci Resolve Mini Panel
The DaVinci Resolve Mini Panel is suitable for those who need a portable and versatile panel. The panel comes with two five-inch high-resolution LCD screens with their own soft knobs and soft buttons, 12 knobs with 4,096 steps per rotation, 48 dedicated navigation and transport keys, and three high-resolution weighted trackballs.
Just like the Micro Panel, it does not require any additional drivers and only needs DaVinci Resolve version 12.5.5. The back side of the panel has a dedicated power supply port. However, Blackmagic does not ship the power cable with the panel, just the USB-C to USB-3 cable. That said, the power supply cable is a generic AC input power cable found anywhere. Users also have the option to connect via a four-pin broadcast supply power cable. Whats great about this panel is the ability to connect via Ethernet, allowing users to connect to a network; it also supports PoE (power over Ethernet), meaning it can be powered via the network connection from a PoE compatible router. There is also a USB-C port to connect via USB.
Upon turning on the product, users once again select the panel from the Preference menu in DaVinci Resolve. The size of this control panel is slightly larger than 17, which makes it an ideal tool for travelling. The body is made of aluminium and also has rubber grips on the bottom of the panel. Additionally, the Mini Panel is designed to be fitted onto a shelf or a rack, and can be fastened to a surface using two tie-down bolts that come out of the chassis.
The stand-out feature of this panel is the addition of the upper deck. On a panel this size, Blackmagic really worked hard to get everything a user could need in a control panel. The upper deck of the Mini panel consists of the two five-inch LCD screens, with their own knobs and soft buttons above and below.
On the left side of the upper deck are the Palette Selection buttons, a set of 15 buttons giving users the ability to navigate through the various palettes available on the colour page of DaVinci Resolve. These buttons provide great mobility throughout the colour page without having to leave the panel. While working on this panel, it was an extreme time saver to be able to use these buttons to jump from palette to palette, making adjustments along the way.
The palette chosen by the user is then displayed on the LCD screens and users can use the soft buttons and knobs to make adjustments to the parameters. Users can even access menu items for the palettes via the soft buttons above the screens, and navigate through the various colour palettes using the left and right arrow buttons.
The first two buttons are Home and Network, allowing users to select the network they would like to join. Whats great is that users can do all of this on the panel itself.
These buttons comprise all the palettes available, including the Window palette, allowing users to make various masks right there on the panel. They can select the type of mask they want via the soft buttons above the screens, adjust the size and position of the masks via the knobs below the screens, and even add or delete masks by simply navigating to the menu via the soft buttons.
Users can select the Curves palette and navigate using the soft buttons above the screens. Through the use of the knobs below the screens, users can easily add points to curves and make adjustments as needed right there on the panel, eliminating the need to go to the computer. These buttons provide a lot of mobility and increase the speed of any workflow.
The right side of the upper deck consists of another set of 15 soft buttons, the Quick Selection buttons. The first eight correspond to the Node tree on the colour page and provide great mobility. Users can add nodes via the Serial node button, or with a window directly via the Node+Circle button. The Copy and Paste buttons allow users to copy and paste grades to different nodes with a few simple clicks.
The rest of the buttons correspond to various aspects of the colour page. These include the Full Viewer button, which enlarges the screen and still displays the timeline and transport controls on the bottom. Users can also very easily toggle between key frames in the timeline with the Prev KF and Next KF buttons. These add great efficiency to a workflow, giving users great control and the freedom to work on the panel itself without the constant hassle of going back and forth from panel to computer.
The lower half of the Mini Panel is exactly the same as the Micro Panel, with the same control buttons and three weighted trackballs. This panel gives users the mobility within the colour page when they combine the buttons on the upper deck and lower half. For example, users can navigate through nodes with the Prev Node button on the lower half, and then add a new node anywhere in the node tree with the Serial button on the upper deck.
As far as small-sized panels go, the Mini Panel has everything one would need, and is affordable for those looking for a top-of-the-range industry-standard panel.
Both control panels are a great addition to any workflow. However, the Mini Panel stands out. It is more advanced in terms of controls, and gives users the ability to navigate and control numerous aspects of the colour page. This panel is ideal for first-time colour graders, and even those who are used to the Advanced Control Panel by Blackmagic. The controls available in the Mini Panel provide a vast array of controls those who have used the Advanced Control Panel wont find anything lacking. That said, the Mini Panel comes at a slightly steep price; at $2,995, it may not be ideal for student filmmakers.
Priced at just $995, the Micro Panel is a better option for those who cannot afford the Mini Panel. It does not feature many of the controls that the Mini Panel does, which affects workflow speed, but with a little more effort, users can achieve similar results to the Mini Panel.
First-time users can very easily adjust to the panels, and for advanced users these two panels are a treat to work with. They are smaller, but they have great power with the features Blackmagic has added.
As far as workflow goes, users can be confident that by using these Blackmagic panels, their workflow speed and efficiency will improve significantly. The real-time grading response is tremendously helpful one small push of a knob and the user instantly sees results, and the sensitivity of the panel gives users extreme control of finer details.
Compared to other small control panels in the market, these two panels are far superior in the control they offer.