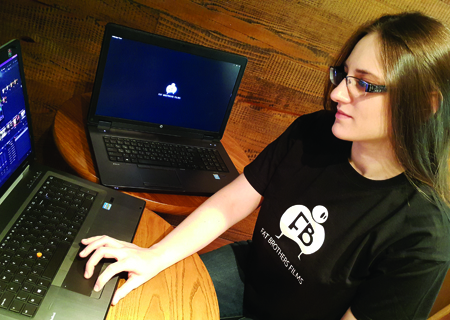
Dubai-based editor Nina Sargsyan gives us the lowdown on DaVinci Resolve Studio version 12.5.

Dubai-based editor Nina Sargsyan gives us the lowdown on DaVinci Resolve Studio version 12.5
Having been a DaVinci Resolve Studio user for six years, I have to say version 12.5 is the most exciting release so far, and also the most polished. With more than 250 new features added and countless enhancements to existing features, DaVinci Resolve 12.5 has made a mark by becoming a more prominent tool in the industry, not just for colour grading, but now for editing as well.
As soon as I took my first look at the GUI, I noticed some important changes. The interface now has a more polished and sophisticated look. Resolve 12.5 has reorganised the previously congested menu, which has made it much more user-friendly and less overwhelming for a first-time user, a crucial aspect to ensuring filmmakers can focus purely on telling their stories.
As with version 12, there are four separate pages, or rooms, that users can go into to complete their projects: Media, Edit, Colour and Delivery. Also as with Resolve 12, there are two different versions of Resolve that users can try: DaVinci Resolve, which is available to download for free from the Blackmagic Design website for Mac or PC, or DaVinci Resolve Studio, which adds additional features for professional users, which is available from authorised resellers for Mac, PC or Linux from $995.
The Edit Page
For starters, lets dive into the exciting new changes on the Edit page. With the addition of a few new features, editing has now become much faster and easier in Resolve 12.5.
When working on large projects with overcrowded timelines and numerous clips to sort through, editors are always looking for ways to simplify workflow. They need to constantly refer to the metadata of the clips they’re working on, and to make that easier, version 12.5 has added the Metadata palette to the Edit Page. In previous versions of DaVinci Resolve, one had to jump back and forth from the media page to check the metadata of clips.
Another enhancement is the option of having Cinema mode be available on the Edit Page, so editors can now seamlessly switch in and out of the mode during playback to easily view their work in full screen. Another handy feature added to the Edit page is the option of viewing a clip’s audio waveforms directly on the video clip as an overlay in the source viewer. This makes it easier to navigate through video and look for audio cues.
Advanced Editing Features
As an editor myself, I work on-site on mobile workstations, jumping from one location to another, always looking for ways to make my workflow cleaner, simpler and more functional, needing more flexible software. With version 12.5, Blackmagic has taken DaVinci Resolve a step further by adding the necessary features for a faster, more functional and smoother workflow, even when editing dailies on set.
Lets start with the basics. The menu on top has now been reorganised and editing tools now have their own menus. The new Trim menu contains all the trimming tools such as Slip, Ripple and Dynamic Trim available in Resolve. The Timeline menu has all the typical tools pertaining to the timeline, such as Add Transition, Match Frame and Split Clip.
Editing workflows need to be functional and simple. Resolve 12.5 has made this easier with the addition of three new features:
1. Ripple Cut allows a user to select clips for removing. By clicking Ripple Cut, the clip is removed and the gap is closed.
2. Paste Insert gives users a chance to add clips to the timeline and ripple the clips in front of it forward.
3. Ripple Overwrite lets a user close an empty gap in the timeline by selecting a clip. This causes the gap to close. If the new clip’s duration is slightly longer than the gap, Resolve automatically ripples the clips in front of it forward.
These three features give users a faster, more functional workflow, without the need to constantly make adjustments in the timeline when removing clips and adding clips, saving valuable time.
With this version, Blackmagic has added a few new video transitions to the existing transition library, including Barn Door and X-Wipe. In addition, users can now edit multiple transitions at once. All you have to do is select a few transitions together and adjust the settings in the inspector, automatically giving all transitions the same settings. This is a great new addition that makes the workflow faster.
Another handy enhancement is Durational Markers. This allows the user to stretch out a marker, spanning it over a few frames or even over a few clips.
DaVinci Resolves retime settings now have a new feature, the Retime Curve. This provides users with a curve editor for their retime settings. This is a great addition, as it gives the user more control over speed changes within a clip. With the choice of linear curve tools or Bezier curve tools, the possibilities are unbelievable, giving the user total control and versatility.
Lastly, DaVinci Resolve has added an amazing feature which I am very excited about. Version 12.5 now has direct integration with Blackmagics compositing software, Fusion. It is the same as in Adobe Premiere Pro, where the user can directly click on a clip and send it to Adobe After Effects, all you have to do is right click a clip in the timeline in Resolve, and you can send the clip to Fusion. Once the clip opens in Fusion, all you have to do is adjust as needed and those changes will be updated in DaVinci Resolve. This new seamless integration is a giant leap for DaVinci Resolve, as it makes the software more versatile. You no longer have to jump between programs; everything can be done within DaVinci Resolve itself.
The Colour Page
As a colourist, its always exciting to see what new features come out with each version of DaVinci Resolve, the leading colour grading software in the market. Version 12.5 maintains DaVinci Resolves status quo as the ultimate professional requirement in the industry for colour grading.
The Node tree on the Colour page of this new version has a few new features and enhancements which make working with nodes much easier. For someone like me who constantly has multiple nodes while grading, I face the issue of it being overcrowded, and having to move nodes around can become extremely tedious. In version 12.5, users can finally lasso all their nodes together and move them around with ease.
Users now get the opportunity to work with High Dynamic Range clips more easily. In this version, Resolve has introduced HDR Mode. One simply has to right click a node and select the option to make grading tools in Resolve work in an extended Dynamic Range, giving the user the ability to work with HDR videos. Version 12.5 also gives users a few more compositing modes to add to the nodes, including Luminosity and Colour Dodge.
The features that caught my eye the most are the effects that can be added to nodes on the Colour page. In previous versions of Resolve, one had to download and install plug-ins to the OpenFX tab. Now, users have a number of effects readily available. In the OpenFX tab, users can add effects such as Light Ray, Gaussian Blur or even Glow to videos. With the addition of these new effects, Blackmagic has once again taken Resolve a step further and made more of an all-in-one tool for graders and editors.
In this version, graders have two new slider options in the Primaries Bar, Temp and Tint. After testing the Temp parameter, the colours achieved had more depth, for a more rich and fluid look without looking artificial. Its a simpler way of changing the overall hue and texture of footage.
The Tint parameter works by bringing a lightness to the colours on the colour spectrum, a great way to subtly adjust the hues of colours without losing depth and intensity. Just touching the Tint parameter adds colour to an image but with a more pastel look, allowing a user to make subtle changes that significantly affect the overall look.
These two new grading parameters allow users to have more detailed grades in Resolve 12.5. In the past, colour graders had to spend a bit more time trying to achieve certain looks. However, with these additions, users can achieve more film-like grades which are rich in colour and layered in appearance.
Enhancement to Noise Reduction
If you decide to opt for the paid version of DaVinci Resolve Studio, there has also been a lot of enhancements to noise reduction features. DaVinci Resolve Studio has always had a great noise reduction tool. Ive always preferred to use it since I have a great deal of control over the amount of noise reduction I apply and the adjustments I make. Now, in the Spatial NR, control users have the Mode option, with two algorithms.
Faster does a quick calculation of the NR that needs to be applied. This mode can produce artifacts.Better switches to a high-quality algorithm which gives better results. This method is processor-intensive.
I tested these two new features out on a noisy night shot. The footage was taken on two different cameras, a RED Dragon and a Canon DSLR. We chose a DSLR camera for its extremely processed capture which does not give us much space to treat the footage, and we chose a RED Dragon for its RAW shooting capabilities that give you a lot of space to treat the footage to your liking. The footage I took from the RED Dragon was RAW footage in extremely low light conditions, with visible noise in the darker areas. However, when the noise reduction was applied, not only was the high frequency noise in the blue channel (the colour channel known to be the noisiest) reduced, the quality of all the footage was also enhanced.
When I took the DSLR footage to DaVinci Resolve Studio and applied the new Spatial Noise Reduction, I was surprised with the results. There was almost no noise in the footage, as if it had been shot on RAW and well-lit. This means the new enhanced Spatial NR not only reduces noise in the footage; it also gives lower-end cameras that do not have the option to record RAW a chance to achieve industry standard quality without expensive lighting.
Of the two modes, I naturally prefer Better, as it removes all the noise for a smoother, more natural look without any artifacts. There was none of the pastiness to the image that comes with many noise reduction tools.
Other Enhancements
The motion tracker in Resolve 12.5 has a new Single Point Tracker which gives users the option to select a point and track footage, which I believe adds more versatility to Resolve as it gives the user more control.
DaVinci Resolve 12.5 Studio now also offers Edit Sizing with an automatic geometric distortion correction. This allows users to fix any footage affected by lens distortions such as perspective lens.
Overall, with the new additions to the Colour page, Blackmagic has enhanced the entire DaVinci Resolve experience, making workflows smoother and grading more in-depth, allowing one to explore the infinite capacities of colour.
Deliver Page
The Deliver page in version 12.5 has been slightly revamped. In Render Settings, users can now see common presets in a panel on top. These include the usual YouTube and FCPX XML, with the addition of two new render presets: Premiere XML and Audio Only.
Premiere XML is the one I have been waiting for since I have been using Adobe Premiere Pro and DaVinci Resolve together. Previously I relied on FCPX XML to go back and forth between the two programs, and every now and then I would encounter inconsistencies which I would have to manually fix. However, after trying the new Premiere XML, I can say that those issues are no longer a concern. The integration between the two is finally consistent and functional.
With the Audio Only option, users can now export just the audio of their timeline. Users can select to export Wav, Quicktime or MXF OP-Atom. This is a great new feature lacking in previous versions.
Render Settings has been reorganised into three tabs.
The Video tab now has the option of exporting media for a 3:2 pulldown with the new 29.97 (3:2) frame rate.
The Audio tab now allows users to export each track as an individual track. The File tab now has various tags one can apply to the custom
file name.
Overall, DaVinci Resolve has been very bold with its features in 12.5, extending its own boundaries. For more than half a decade in the colour grading industry it has had no capable adversary.
Everything Blackmagic has added to Resolve this time around has made it more of an all-in-one tool; more than anything else, there is no longer any need to constantly go from programme to programme. Depending on requirements, users can now freely edit, composite through Fusion, grade in Resolve and output footage without ever leaving the interface.
As a long-time Adobe Premiere Pro editor, I can safely say that DaVinci Resolve 12.5 is not only the best for colour grading; it is now among the leading editing software solutions in the market.
Nina Sargsyan is Producer and Special Effects Supervisor at Fat Brothers Films Production, UAE.


